Build your first View
A View is a search page you build without code. It brings together a data source (one of your indexes), filters, results, pagination, meta data and a card template. This guide walks through each part.
Create an index and run your first reindex, so your View has content to search.
1. Create a view
Go to SearchSync → Add New View. Give the view a name; its slug is generated from the name, and it's how shortcodes find the view later. Then open the sidebar:
- Data Source: pick the index this view searches.
- Settings: pick the page you'll put the view on. The Preview button opens that page.
The Results Settings panel sets how results are listed:
- Widget Type: Hits (numbered pages) or Infinite Hits (a "show more" list)
- Hits Per Page and Columns; columns are a maximum, and the grid steps down on narrow screens
- Result Singular Label and Result Plural Label, such as "result" and "results"
- a "Nothing Found" Message for searches with no results
The labels and the message appear in the view's meta data, so add a Stats item to show them.
Click Save. The view starts as a draft; set Status to Published when it's ready.
2. Add filters
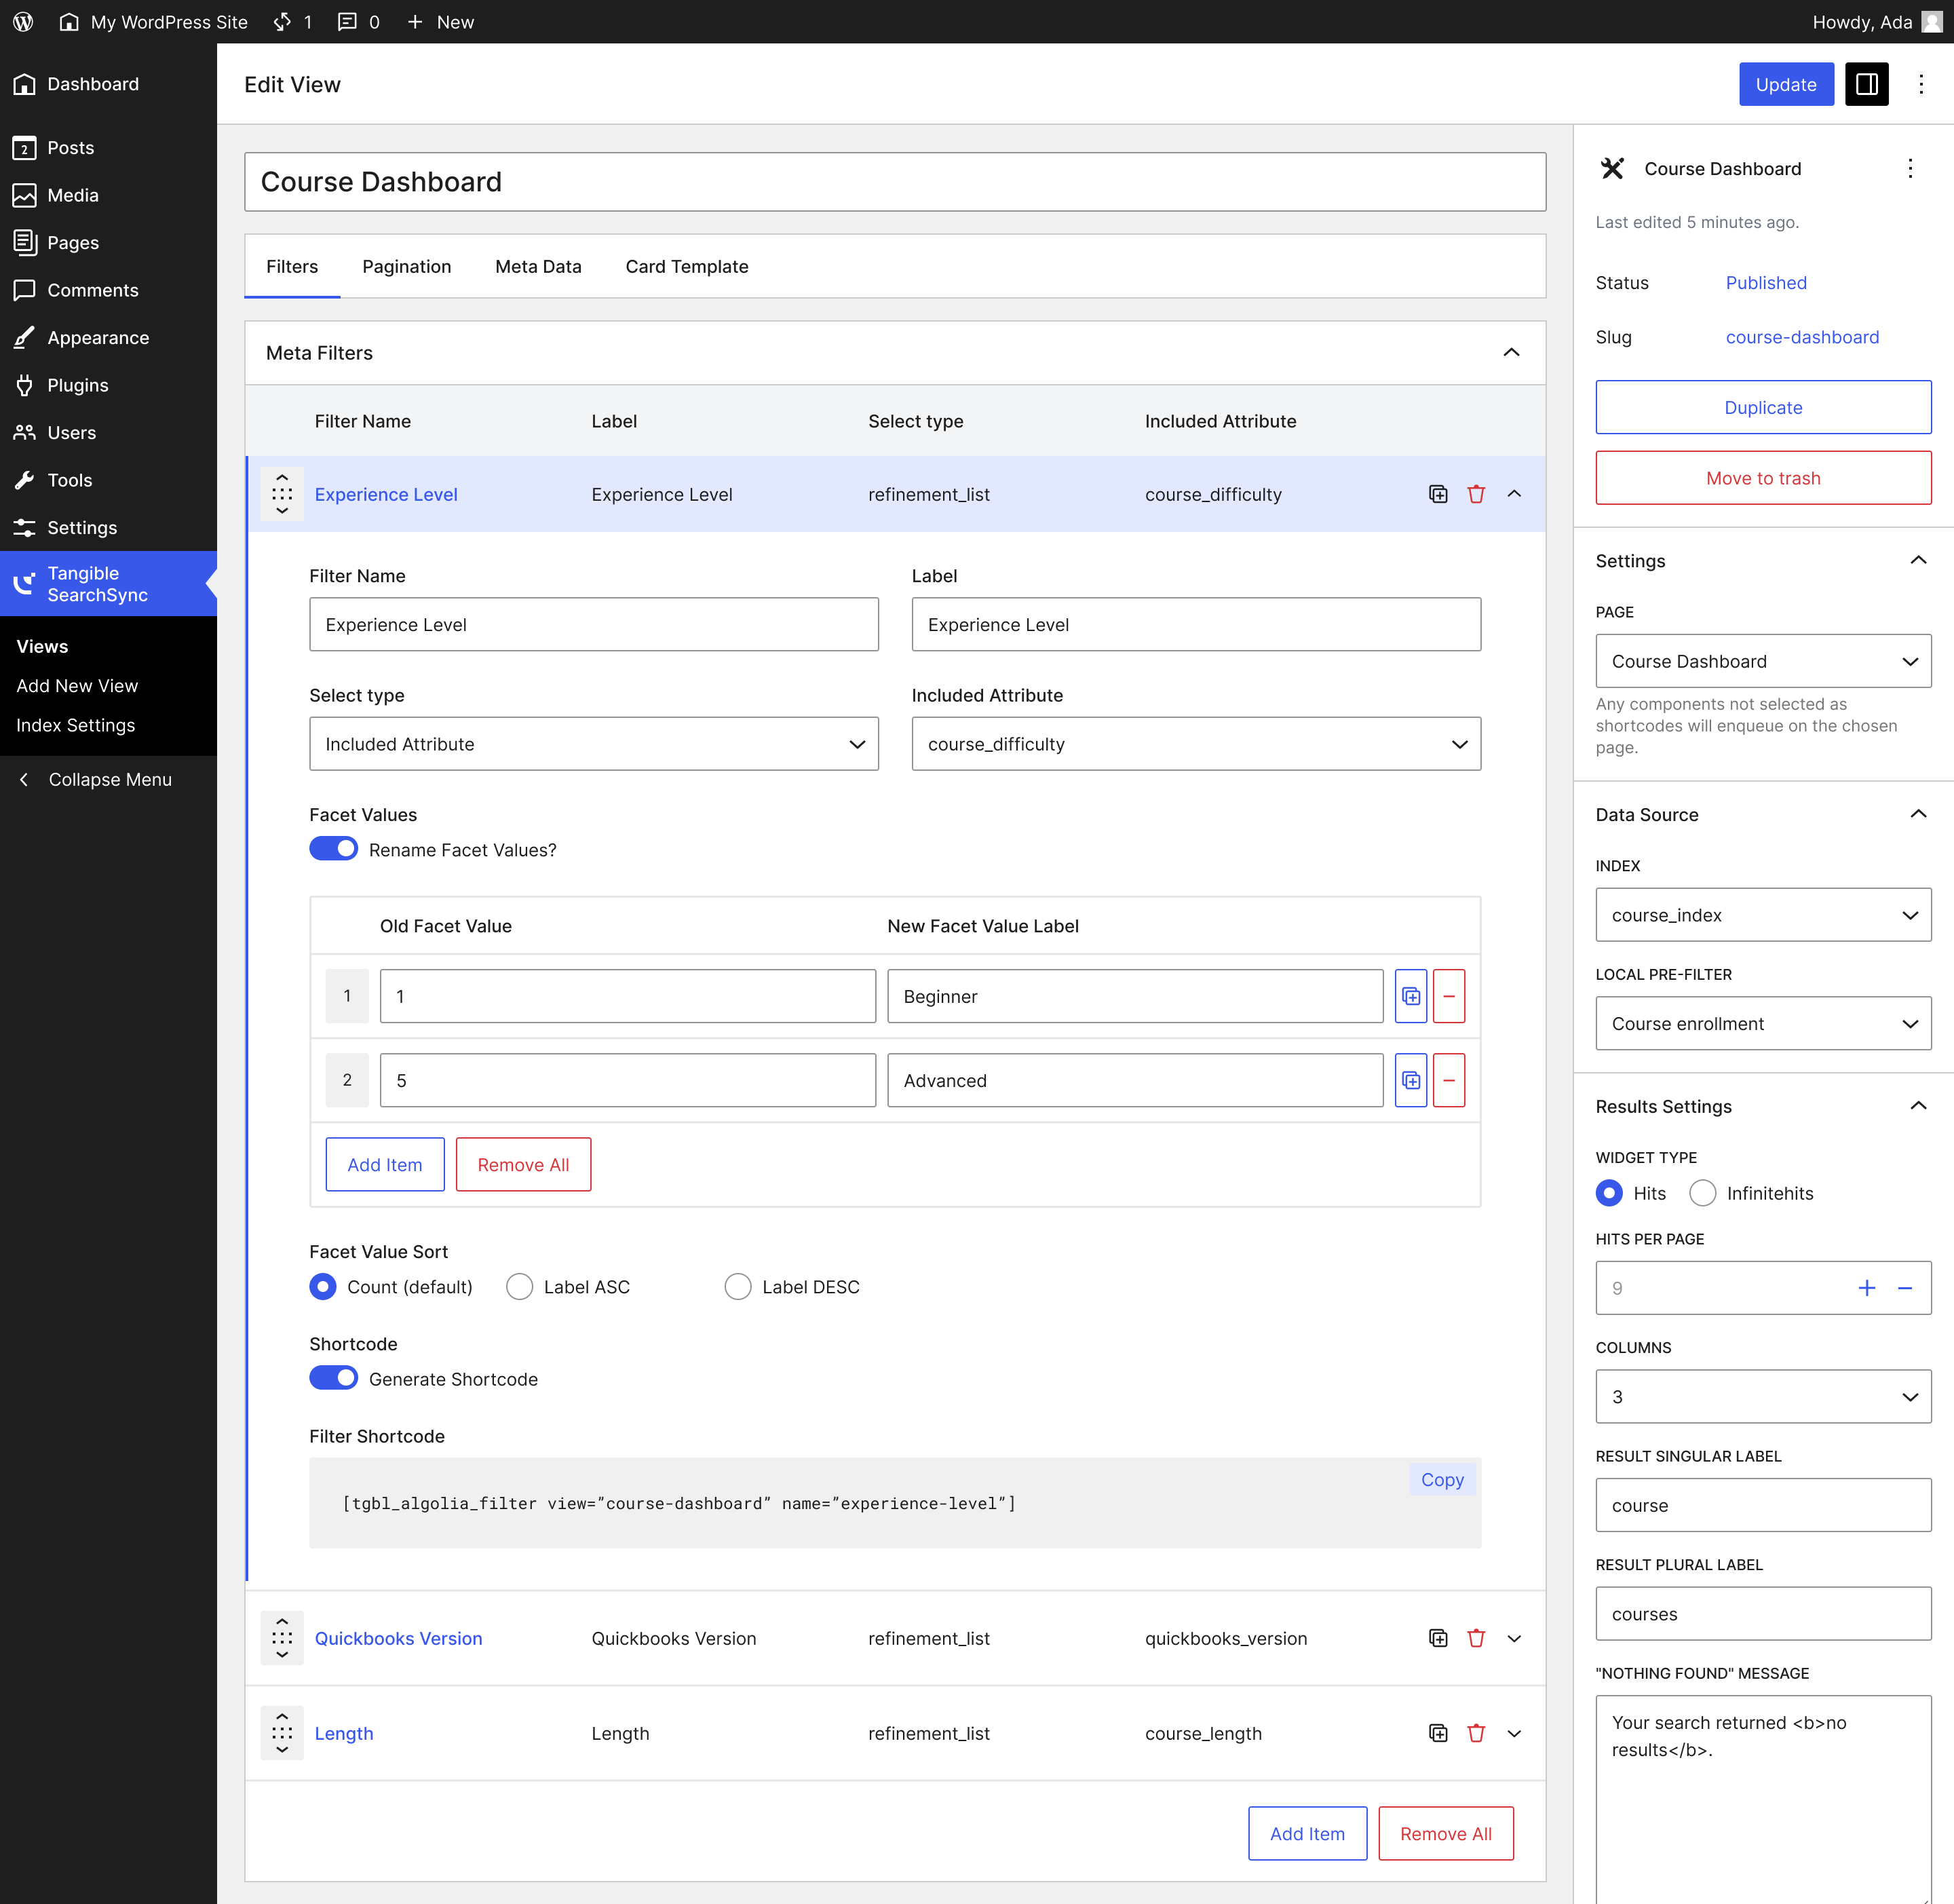
Filters are InstantSearch widgets. Add them on the Filters tab and link each one to an attribute from your index.
| Widget | Use it for |
|---|---|
| Search Box | The search field itself |
| Refinement List | Picking several values from a list of checkboxes |
| Menu | Picking one value from a list |
| Menu Select | Picking one value from a dropdown |
| Toggle Refinement | Switching one condition on or off |
| Sort By | Letting visitors change the sort order |
| Current Refinements and Clear Refinements | Showing and resetting the active filters |
See Filter widgets for the full list. For each filter you can set a label, rename facet values and sort them by count or by label. Show your filters as an accordion and choose which panels open by default: see Filter settings.
3. Add pagination and meta data
Use the Pagination tab to split results into pages, or let visitors choose how many to see per page. The Meta Data tab adds a results summary such as "Showing 1 - 20 of 1,234 Courses". See Results and pagination.
4. Choose a card template
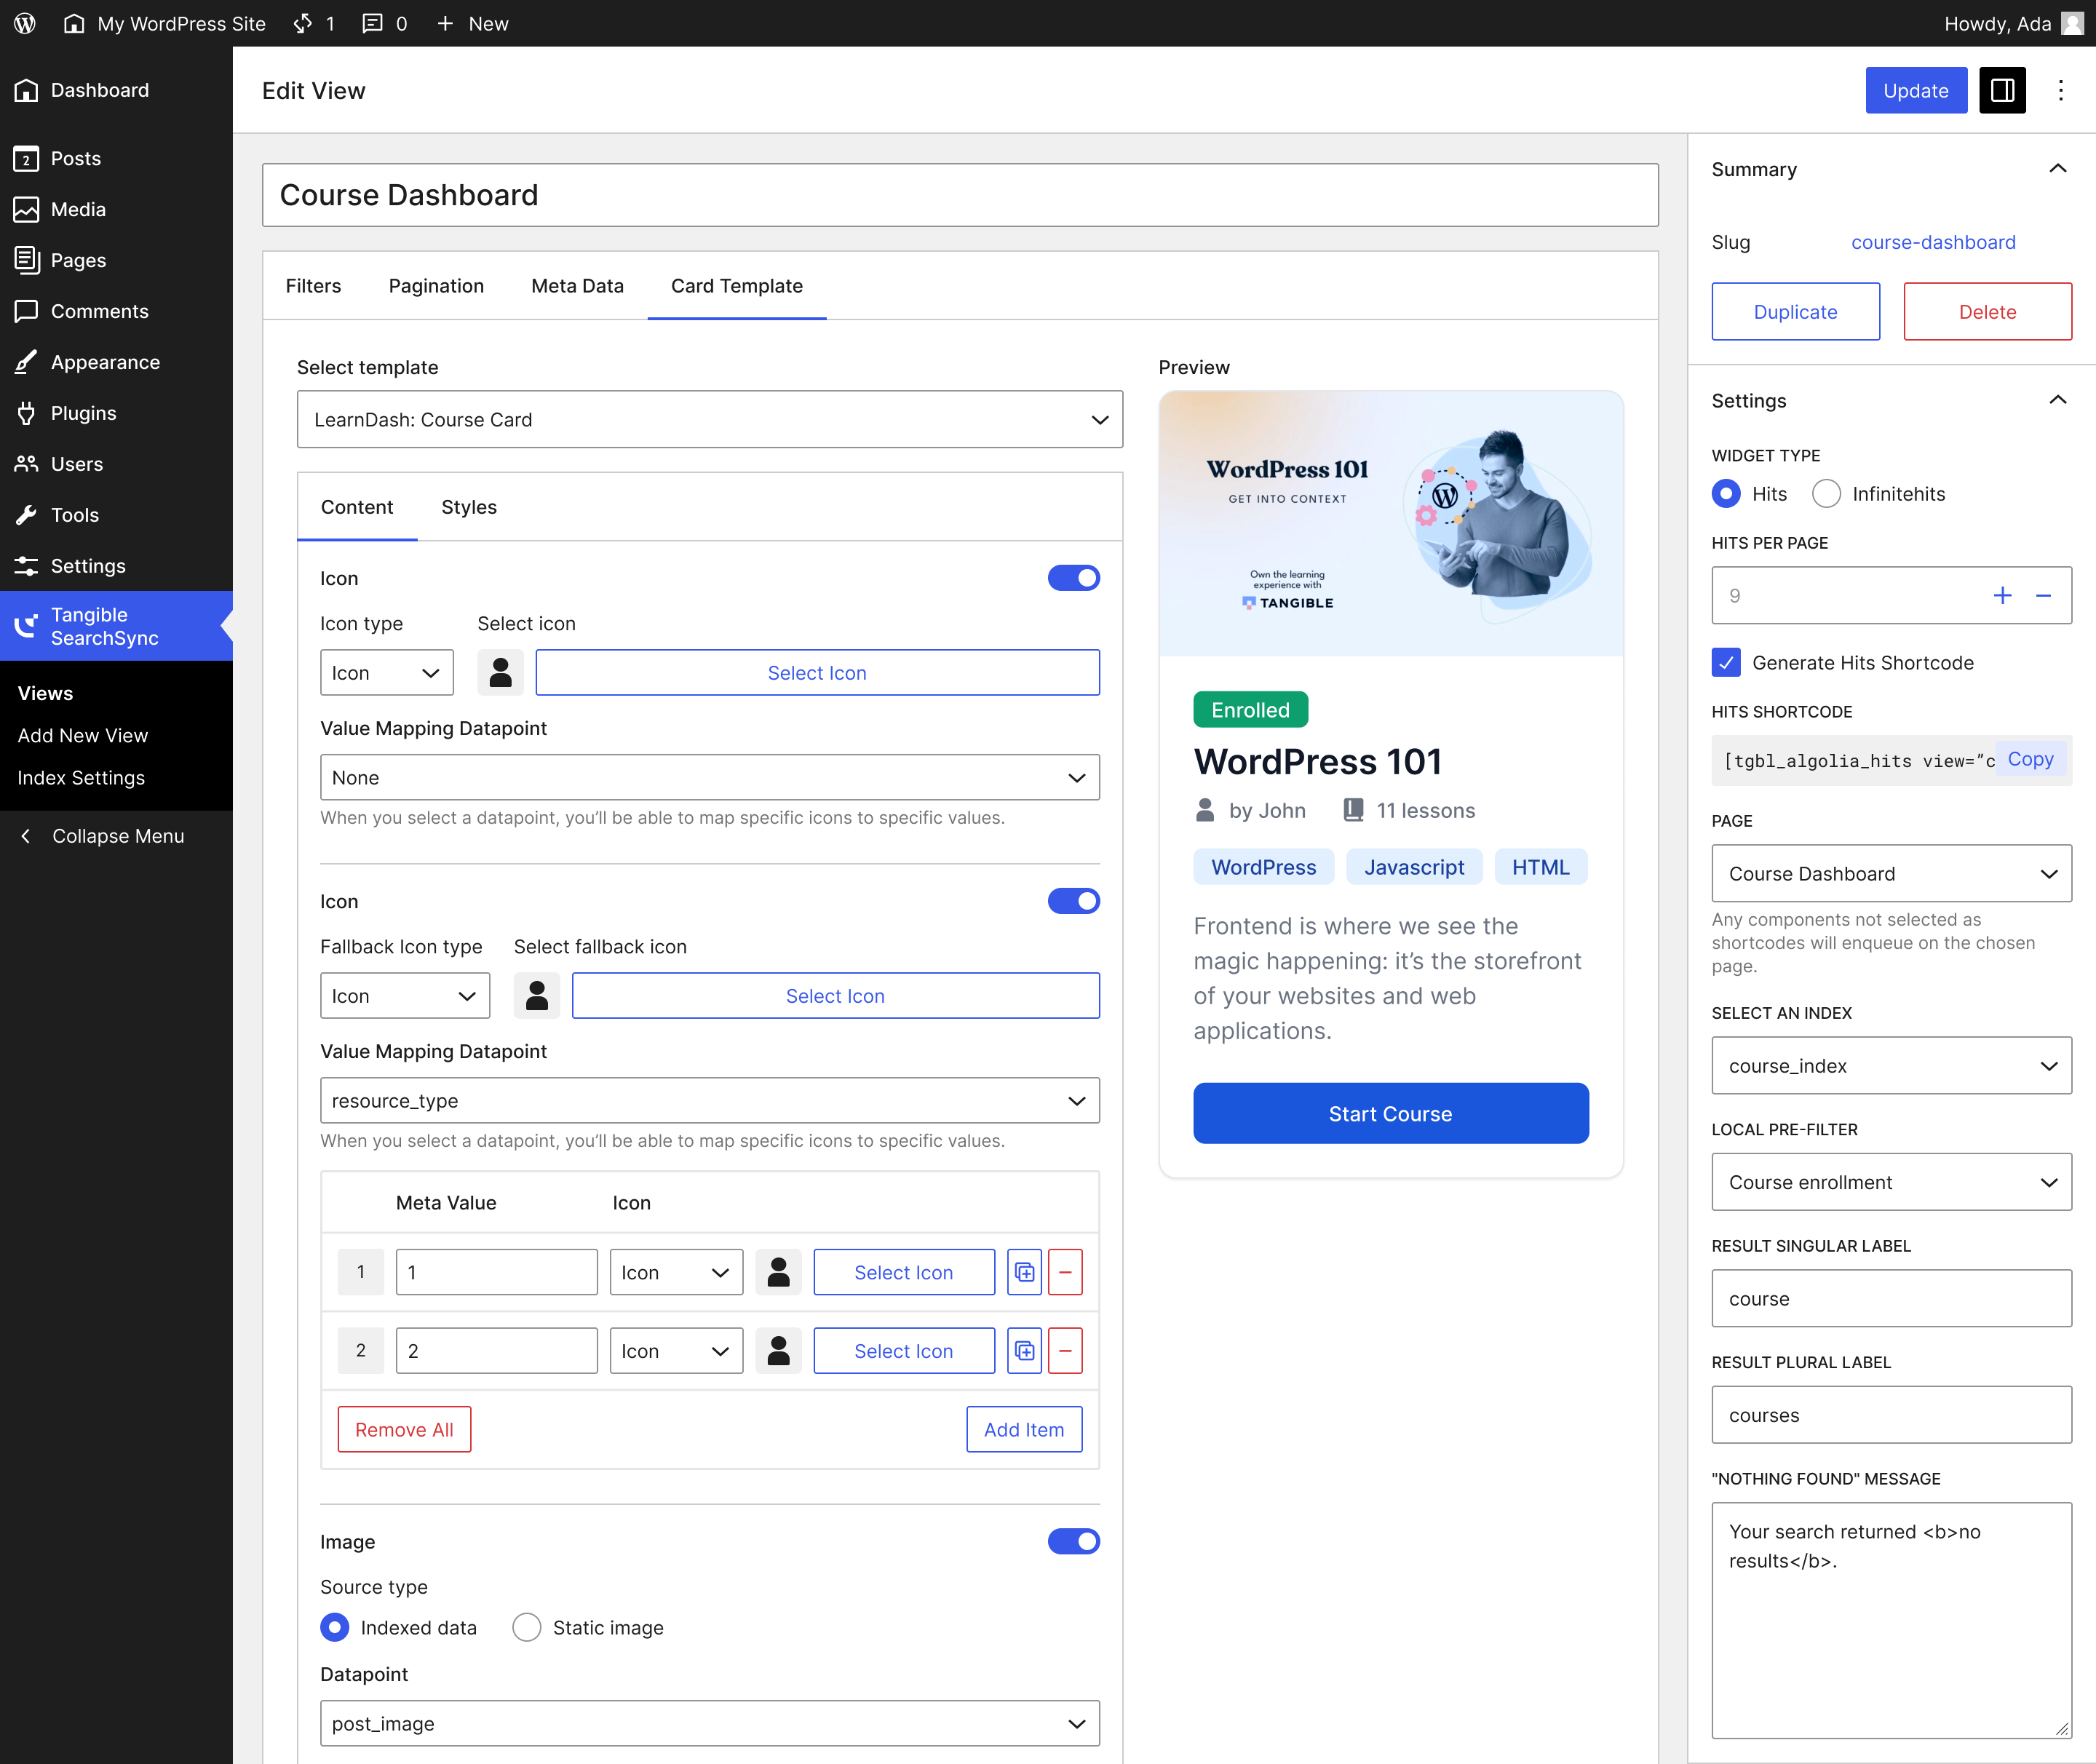
On the Card Template tab, pick how each result looks: Course Card, Inline Course Card, Post Card, Text Card or Compact Row. Map your indexed fields to the card's image, title, metadata, tags, description and call to action, then set its colours, font sizes and shadow. See Card templates.
5. Add the view to a page
Each part of a view has its own shortcode. Add your view's slug in the view attribute, and for a filter, its name too. Paste them where you want each part to appear:
[tgbl_searchsync_filter view="course-dashboard" name="experience-level"]
[tgbl_searchsync_metadata view="course-dashboard" metadata="result-count"]
[tgbl_searchsync_hits view="course-dashboard"]
[tgbl_searchsync_pagination view="course-dashboard" name="pages"]
Filters without their own shortcode are shown together by the grouped filter shortcode, [tgbl_searchsync_filter view="course-dashboard"]. See Shortcodes for every tag and attribute.